Murphy
My adventure into Watercooling PCs
(The following content is circa 2001...)
Murphy was a highpoint of my computer bulding career. As you can read from the stats (if you are a particularly computer saavy person, that is) you will probably notice that this computer was state of the art circa 2001 - which is when I built its original form. I have debated removing this website, but I have decided to keep it around for archival purposes. If you have any questions about my design, feel free to email them to me.
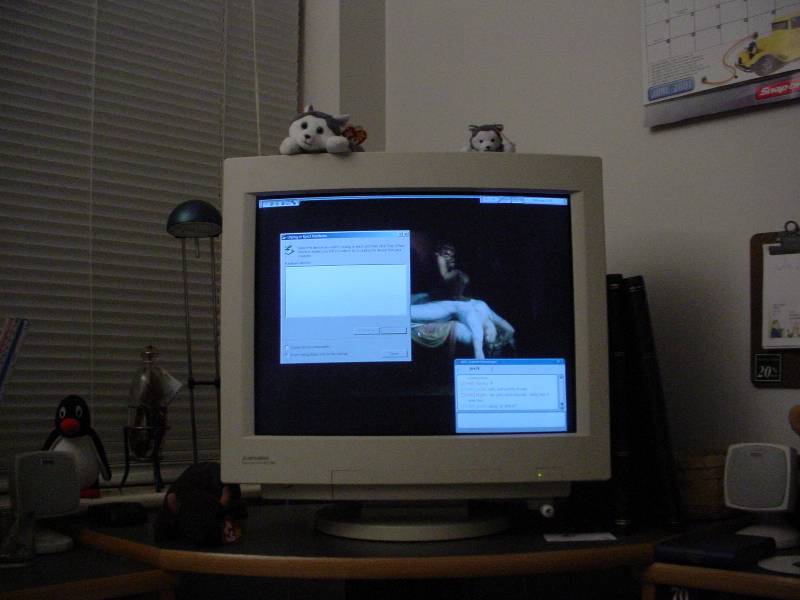
Murphy is my home computer, in case you did not know. I chose the name Murphy based on Murphy's Law - summarized as "Anything that can go wrong, will go wrong." The amazing thing about it is that i have spent a considerable amount of time and money on the project, and somehow i keep finding new parts i always want to buy to add on...
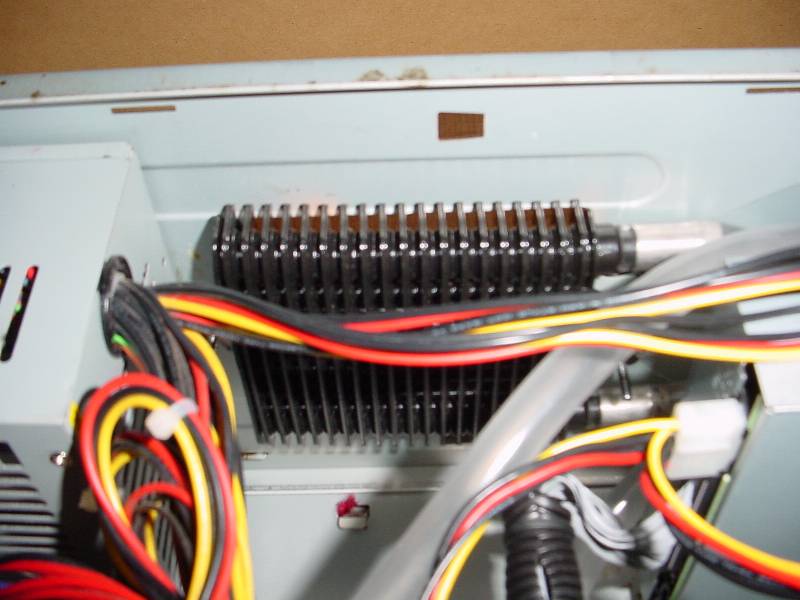
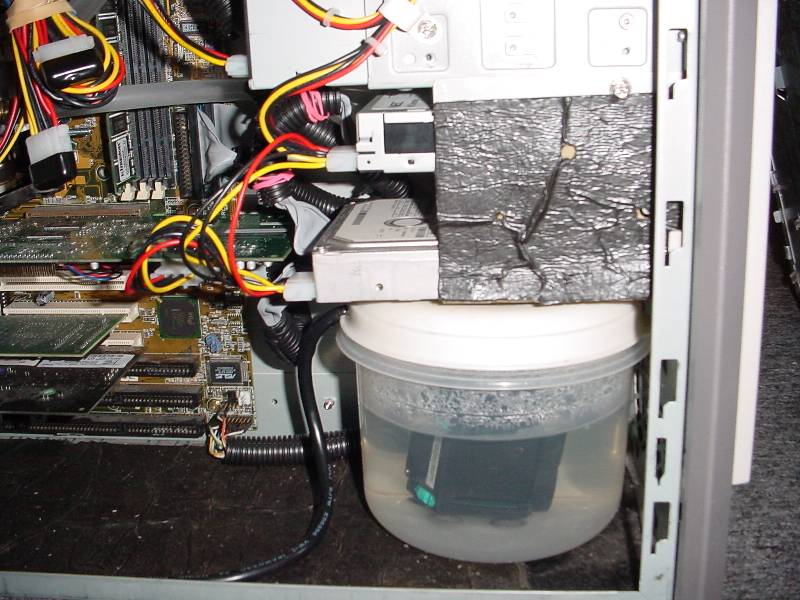
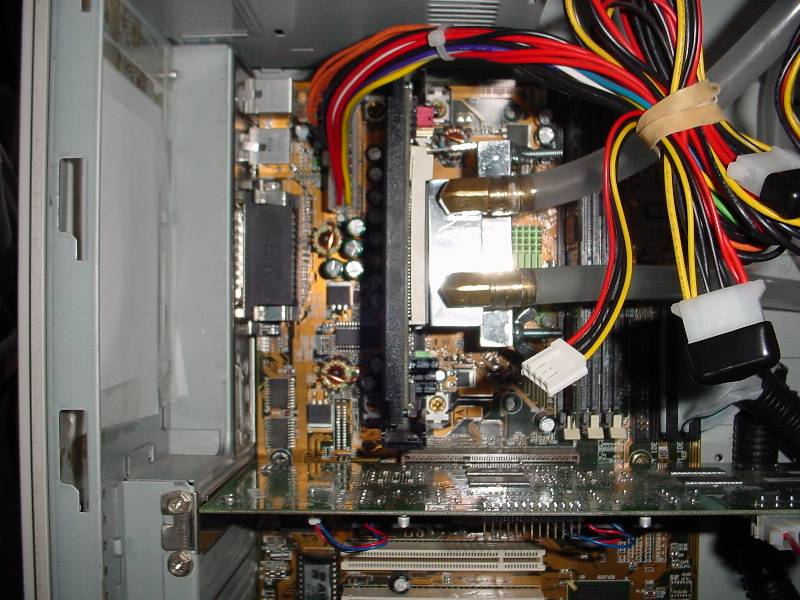
Another odd thing that many people in this area have not seen yet is the introduction of a water cooling system in replacement of a fan to cool the processor. Since i live in the room with my computer (its a small apartment, i am still a student here at UVA) i wanted to keep down fan noise to the minimum possible (so i can sleep!). Now instead of a fan turning 5000+ rpm to cool an already overclocked system, i use a waterblock attached to the processor die which absorbs the heat and transfers that to water. The water runs through a radiator which removes the heat. Now the only noise in the system is a small water pump, which is a low hum i can hear if all is quiet, but still low enough i can sleep over it.
Lets look at some pictures to show what the system has included inside.
|
|
In case you were wondering, I never had a leak while using this system in this configuration. Even though all the hoses were connected to the radiator/waterblock without any clips or glue, the pressure of the water was not enough to ever cause any problems. On the other hand, due to evaporation, it was common to have to top up the resevoir monthly just to be certain the pump always had a supply ready. I did use distilled water though because in case of a leak, distilled water was less likely to cause shorts and failure than normal tap water. Keep this mind in case you ever watercool electronics - Distilled Water does not conduct elecricity as well as mineral water does.
I did however have a leak with another temporary rig that I set up which caused a video card to fail. The leak occured because I reused a rubber water hose which was previously streatched, and water leaked out. This time, the distilled water combined with dust on the video card and caused a short. Amazingly, there was about a 12 hour period where water literally sat on the video card without causing failure.
Last modified January 26, 2016.